
How to use a vocoder: put the effect on a clear vocal, give it a harmonically rich carrier or MIDI notes, set the song key, then blend the processed sound until the words stay understandable. That is the whole idea. The hard part is not getting a robot voice. The hard part is keeping the hook readable.
This guide shows the fast setup, the routing logic, the controls that actually matter, and a test that keeps you from mistaking louder for better.
Disclosure: Rys Up Audio makes RysUpVocoder. The workflow below works as a general vocoder method, but product specific examples use our plugin. Technical references were checked against current Rys Up shipping data and official Ableton, Apple, and Avid documentation on August 17, 2026.
What a vocoder actually does
A vocoder combines two jobs. The modulator supplies the rhythm, vowels, and consonants. Your vocal is usually the modulator. The carrier supplies the pitch and harmonic body. A bright synth, internal oscillator, or MIDI driven voice can be the carrier.
The plugin splits the modulator into frequency bands, tracks the movement in those bands, and transfers that movement to the carrier. Your words shape the synth. The synth gives the words a new body.
Modulator
Your vocal provides timing, vowels, consonants, and expression.
Carrier
A synth or generated voice provides pitch, density, and harmonic color.
Vocoder output
The carrier follows the changing shape of the vocal.
Choose the right input mode first
Do not start by turning every knob. Start by deciding what should control the pitch.
- Voice mode follows the incoming performance. Use it when you want the fastest transformation and the original melody already works.
- MIDI mode lets played notes or chords control the carrier. Use it for exact harmonies, held chords, and new melodies built from one vocal take.
- Sidechain mode brings a second audio source into the process. Use it when you want a separate synth, drum loop, or texture to become part of the carrier or analysis path.
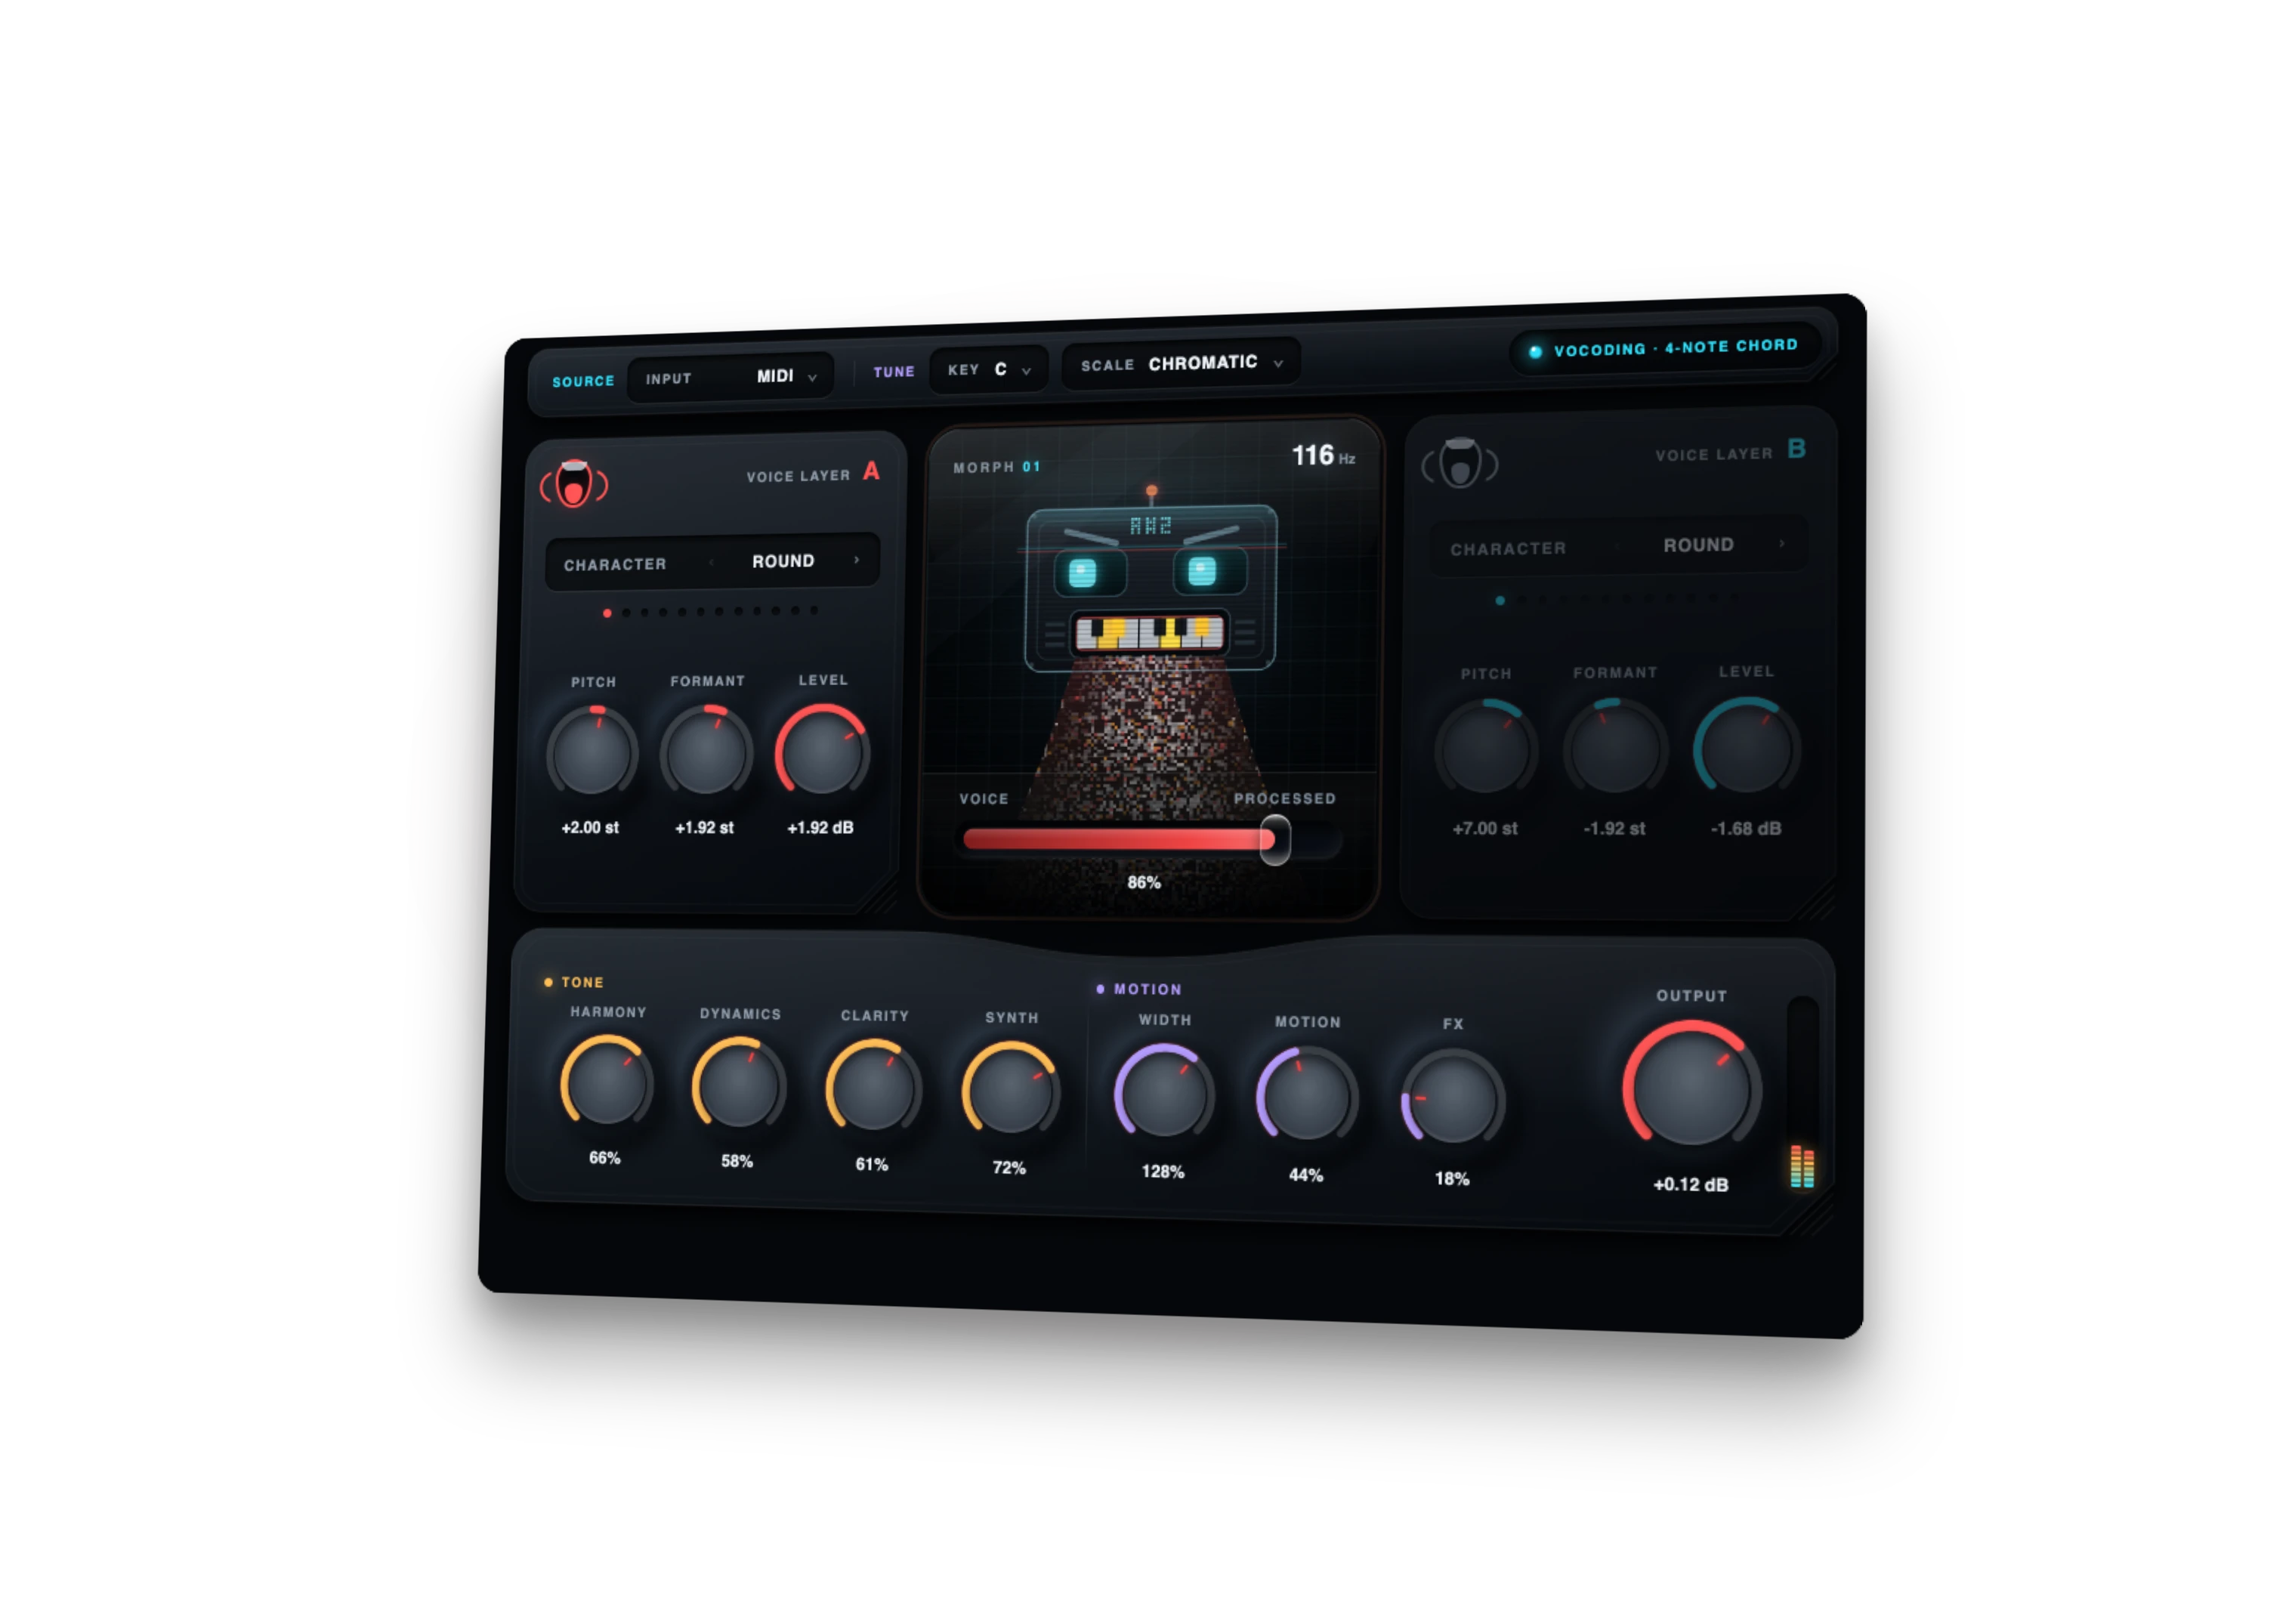
RysUpVocoder exposes Voice, MIDI, and Sidechain source modes. The current shipping build is version 1.1.8 for macOS and Windows, with AU, VST3, and AAX delivery through the Hub.
The five minute vocoder setup
- Use a clean vocal. Edit loud breaths, heavy room noise, and obvious clipping before the vocoder.
- Insert the vocoder on the vocal track. Start with the plugin receiving the same dry vocal you would normally mix.
- Pick Voice or MIDI mode. Voice is the fastest starting point. MIDI is better when the exact notes matter.
- Set the key and scale. Match the session before building harmonies. Chromatic mode is useful for sound design, but it gives the pitch system fewer musical boundaries.
- Build one layer first. Choose a character, set pitch and formant near neutral, then raise the processed blend slowly.
- Add the second layer only when needed. Use it for a harmony, octave, wider texture, or contrasting character.
- Level match the output. Bypass the plugin and match perceived loudness before judging the result.
If the first layer is not clear, a second layer will not rescue it. It will only make the blur wider.
Keep the words understandable
Clear vocoder vocals begin before the plugin. Use a direct performance with crisp consonants and controlled room sound. Whispered delivery can work for texture, but it usually gives the analysis less stable pitch and less useful harmonic information.
Inside the plugin, keep the processed blend lower than your first instinct. Move the formant in small steps. Add clarity until the consonants return, then stop. If the result gets sharp, back down the top end instead of burying the whole sound.
A bright carrier often improves articulation because it gives the vocoder more harmonics to shape. Official Ableton guidance makes the same practical point for external carrier setups. Saw based sounds are a useful starting place because they contain dense harmonic information.
Use two layers without building mush
Two layers are useful when they have different jobs. Copying the same settings on both sides usually makes the sound louder and less focused.
| Layer | Job | Starting move | What to avoid |
|---|---|---|---|
| Layer A | Main identity | Near neutral pitch and formant | Extreme width before the words are clear |
| Layer B | Harmony or contrast | Lower level with a deliberate interval | Equal level when it fights the lead |
Start Layer B quietly. Try an octave or a chord tone that belongs to the song. Change its character or formant just enough to separate it from Layer A. Then use width to create space instead of using level to force size.
Route MIDI and sidechain audio in any DAW
DAWs use different labels, but the signal logic stays the same.
- Keep the vocal on the audio track that holds the vocoder.
- Create a MIDI track when you want notes or chords to drive the plugin.
- Route that MIDI track to the vocoder instance or its MIDI node.
- Create a separate audio or instrument track when you want an external sidechain source.
- Send that source to the plugin sidechain or key input.
- Mute the separate carrier output if you want to hear only the vocoded result.
In Ableton Live, third party sidechain inputs are exposed through track routing. In Logic Pro, the plugin header supplies the sidechain chooser. In Pro Tools, use the Key Input selector for the bus feeding the plugin and route MIDI to the plugin node when MIDI control is required. Exact menu names can move between software versions, so follow the signal path rather than memorizing one screenshot.
Place the vocoder inside an editable Pro Tools chain
Keep the vocoder as one creative stage, then compare the surrounding cleanup, tuning, dynamics, and ambience inside an editable Pro Tools vocal preset. Level match the result before deciding the effect belongs in the chain.
Build a musical vocoder part
A held chord under every word gets old fast. Treat the vocoder like an arrangement part.
- Use one note for the verse and wider chords for the hook.
- Leave gaps after important phrases so the dry lead can answer.
- Automate the processed blend on the last word of a line.
- Print a harmony pass and edit it like audio when the timing needs precision.
- Use short chord changes that follow the lyric rhythm instead of holding one block for the full bar.
The effect feels bigger when it has somewhere to arrive. If it runs at full intensity for the whole song, the listener stops hearing the transformation.
Run this honest test before you commit
Loop one phrase with hard consonants, a held vowel, and one pitch change. Print three versions at the same perceived level.
- Voice mode with one layer.
- MIDI mode with a single note or simple chord.
- The finished two layer version inside the full instrumental.
Judge the words first, musical pitch second, and size third. If the solo effect sounds exciting but disappears in the beat, reduce low mid density, pull back the second layer, or create more contrast with the dry lead. Do not decide from a louder solo bounce.
Fix the four most common problems
The words vanish
Use a cleaner vocal, a brighter carrier, less formant movement, and more clarity. Reduce the processed blend before adding more top end.
The notes feel wrong
Check the song key, scale, MIDI routing, and held notes. Test one note before testing a full chord.
The sound is thin
Add the second layer quietly, choose a denser character, or use an octave. Do not solve thinness with output gain alone.
The mix feels crowded
Shorten the part, lower the width, remove competing effects, and let the dry lead own the center.
Pick a vocoder that fits the job
If you want the full category decision, read the best vocoder plugins guide. It compares focused vocal instruments, broad resynthesis suites, and classic carrier based tools without pretending they all do the same job.
For the fastest two layer workflow in this tutorial, RysUpVocoder is $29.99 outright. It is also included with RysUpSuite from $9.99 per month on the annual plan. Browse the full plugin lineup or use the RysUpHub installer when you are ready to load the chain.
Once the vocoder part works, place it inside the wider vocal chain order without crushing the articulation you just built.
Sources checked August 17, 2026
- RysUpVocoder product page for current price, formats, platforms, and public controls.
- RysUpVocoder update feed for shipping version and platform artifacts.
- Ableton Live Audio Effect Reference for carrier, modulator, articulation, and external routing concepts.
- Apple Logic Pro EVOC 20 overview for MIDI and sidechain setup concepts.
- Avid key input guide for external sidechain routing.
Working in Logic Pro? Follow the exact EVOC 20 sidechain and MIDI setup.
Working in Ableton Live? Follow the exact carrier routing and no sound checklist.
Working in REAPER? Use this REAPER vocoder routing guide for the exact ReaVocode channel map, MIDI route, and no sound fixes.
Once that route works, place the creative effect after an editable Reaper vocal chain so tuning, cleanup, and tone stay separate from the vocoder layer.
The carrier and modulator idea stays the same, but FL Studio has its own port workflow. Use this FL Studio vocoder routing guide for the Mixer track, MIDI Out port, wrapper input, sidechain, and print path.
If your reference uses a mouth tube, verify the recording method before copying a plugin chain. The vocoder versus talkbox workflow guide shows the two signal paths and their different capture requirements.
If you are still choosing the effect, compare vocal tuning with vocoding before rebuilding the routing. One adjusts the performance pitch; the other uses the voice to shape a synthetic part.