
To use a vocoder plugin in FL Studio, put the vocal on a Mixer track, load the VST3 vocoder in that track's effect slot, send MIDI notes from a MIDI Out channel to the same input port, then confirm the vocal and notes overlap. Use a sidechain only when the plugin needs its auxiliary vocal input.
Disclosure: Rys Up Audio makes RysUpVocoder. The FL Studio routing steps use current Image Line documentation and the shipping plugin input layout checked September 5, 2026.
The fast answer: choose MIDI mode for the simplest playable vocal. The vocal stays on the main input. MIDI Out sends the chord or melody. Match the MIDI Out Port to the plugin wrapper Input Port. Silence usually means the port is wrong, the notes do not overlap the vocal, or monitoring is off.
Choose the vocoder mode before routing
A vocoder needs a modulator and a carrier. The modulator is usually the vocal that shapes the words. The carrier supplies the pitched tone that becomes the robotic voice.
RysUpVocoder has Voice, MIDI, and Sidechain input modes. MIDI mode uses the main vocal input and the plugin's internal playable carrier. Voice mode follows the incoming voice. Sidechain mode moves the vocal modulator to the plugin's auxiliary input.
Start with MIDI mode. It proves the basic vocal plus note path before you add a sidechain. Use the general vocoder guide when you need the carrier and modulator theory across several DAWs.
Install and scan the VST3 plugin
Install the current build through RysUpHub, then open FL Studio and run a verified plugin scan if the effect is missing. Image Line recommends the VST format for project compatibility across macOS and Windows.
Open the Plugin Picker or the Mixer effect menu and search for RysUpVocoder. Load it as an effect on the vocal Mixer track. Do not load it as a standalone instrument channel for this workflow because the main audio vocal must enter the effect.
If FL Studio still cannot see it, confirm the standard VST3 path is included, enable Verify plugins, and rescan previously verified plugins. Restart the host after an installer update when the old build remains cached.
Put the vocal on one Mixer track
Route the recorded vocal Channel to a dedicated Mixer track. Name it VOCODER VOCAL. Place RysUpVocoder in an empty effect slot and set Input Mode to MIDI.
Keep the dry vocal route simple while testing. Turn off other sends and bypass effects after the vocoder. Confirm the raw vocal reaches the track meter before diagnosing the plugin.
The plugin should receive the vocal on its main stereo input. No sidechain is required in MIDI mode. If the plugin meter stays flat, the Channel is assigned to the wrong Mixer track or the clip is not playing.
Send notes with MIDI Out
Add FL Studio's MIDI Out plugin to the Channel Rack. Choose any unused Port number, such as 20. Open the RysUpVocoder wrapper settings and set its Input Port to the same number.
Image Line documents this exact internal VST connection: the MIDI Out Port and the target plugin wrapper Input Port must match. The number itself does not matter. The match creates the route.
Open the MIDI Out Piano roll and draw sustained notes or chords. Extend them across the words you want to process. MIDI carries control data, not audio, so the vocal track still supplies the modulator.
Make the notes overlap the vocal
Play the vocal and MIDI pattern together. A note that ends before the word ends removes the pitched carrier from that word. A MIDI pattern that starts late makes the first syllable disappear.
Start with one sustained chord across a complete phrase. Once the signal works, write the real harmony or melody. This separates routing problems from performance problems.
Keep the chord inside the singer's useful range. Very low carriers blur consonants. Very high carriers can make the result thin. Move the notes by an octave before changing ten plugin controls.
Set the words for clarity
| Problem | First move | What to hear |
|---|---|---|
| No word shape | Raise Clarity and check the vocal input | Consonants become readable |
| Thin carrier | Lower the MIDI notes or add a grounded layer | More body without mud |
| Muddy phrase | Reduce low tone and shorten release | Words separate cleanly |
| Harsh top | Reduce air or soften the bright layer | S sounds stay controlled |
| Weak width | Separate the two layers and adjust Width | Center remains stable |
Build intelligibility before size. One clear layer is better than two blurred layers. Add the second voice only after the lead layer carries the complete phrase.
Use Sidechain mode for an auxiliary vocal
Sidechain mode does not mean external synth carrier in this plugin. It moves the vocal modulator to the auxiliary input. The internal engine still builds the pitched carrier.
Route the auxiliary vocal Mixer track to the track holding RysUpVocoder with Sidechain to this track. Open the plugin wrapper Processing tab, then assign or automatically map the sidechain to the auxiliary stereo input.
Image Line notes that sidechain audio should be muted on the normal send path when the signal is intended only for a plugin input. Otherwise you may hear a parallel dry signal and think the vocoder mix is leaking.
Know why stock vocoder tutorials look different
Older stock tutorials often route a vocal and synth as separate Mixer signals into a native vocoder. Some use left and right channel splitting. Others use multiple sidechain inputs.
A third party VST3 can expose a different bus layout. Follow the plugin's real inputs, not a screenshot from a different processor. For RysUpVocoder MIDI mode, the shortest path is main vocal audio plus MIDI notes.
Use stock examples to understand the carrier and modulator idea. Use the wrapper Connections panel to match the actual plugin buses in your session.
Build the voice in RysUpVocoder
RysUpVocoder turns one vocal into a playable two layer instrument. Each layer has character, pitch, formant, and level controls. The main surface also exposes processed blend, harmony, dynamics, clarity, width, effects, and output.
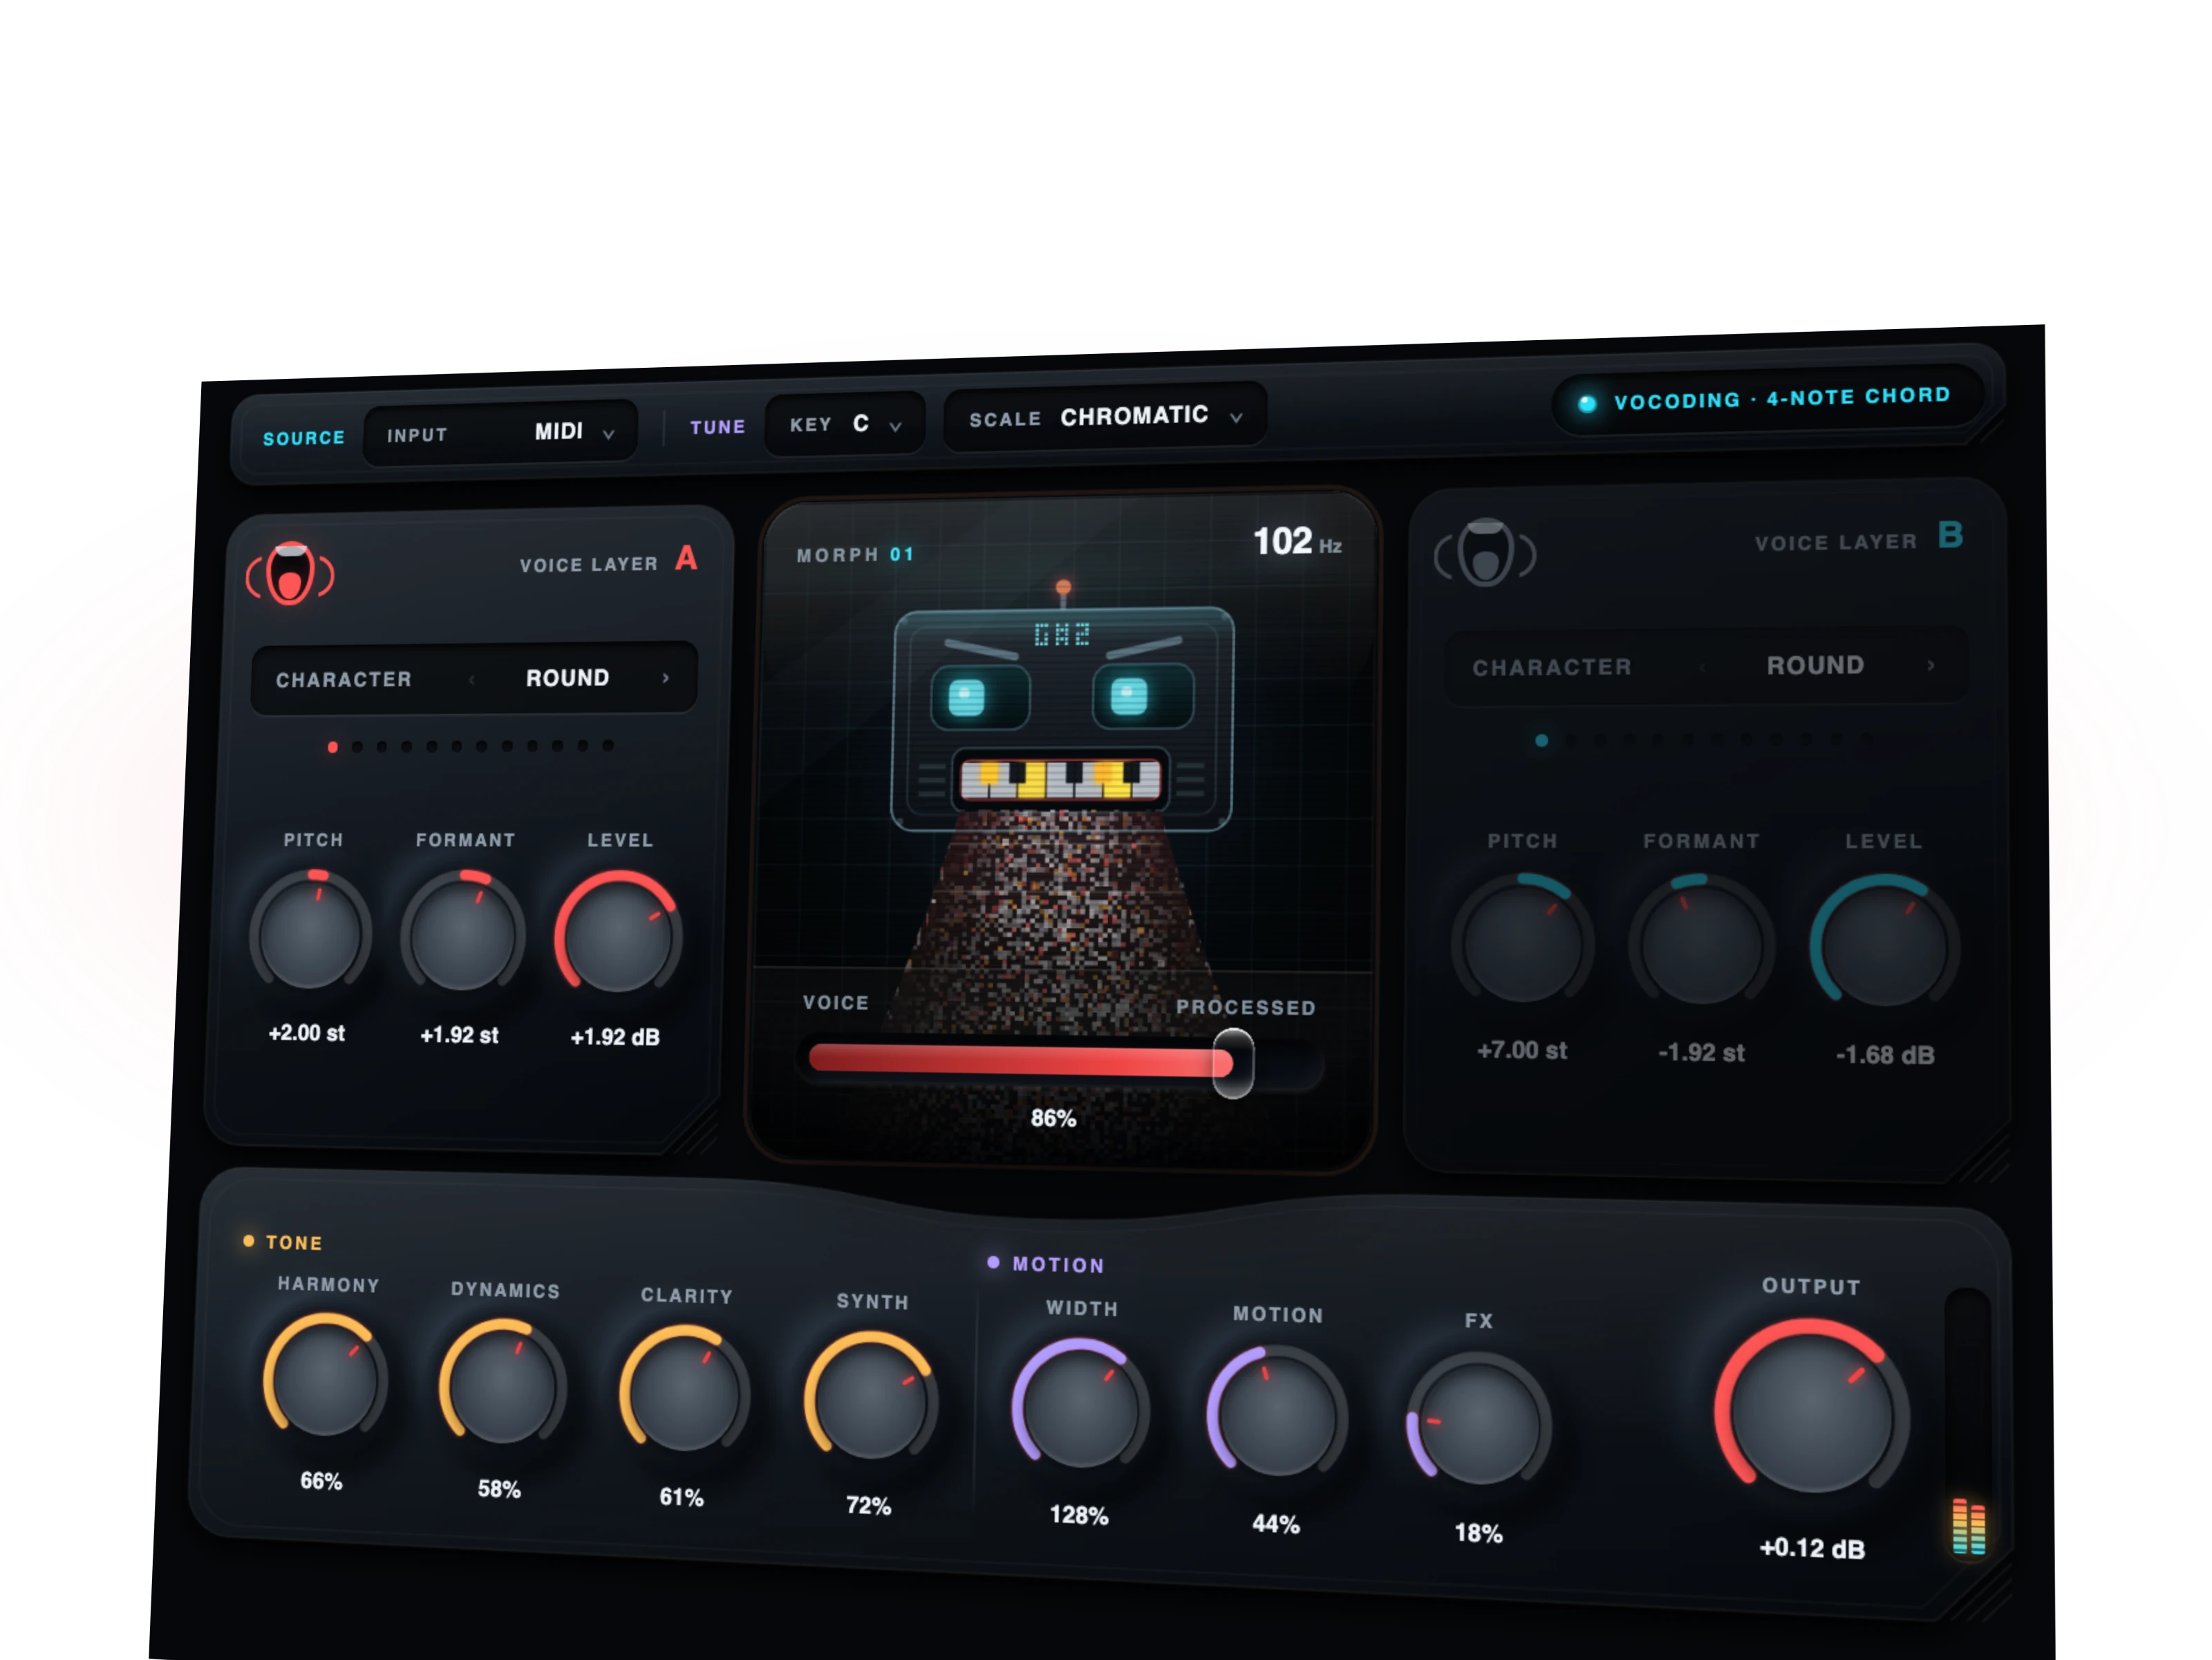
The current release is version 1.1.4. It costs $29.99 outright and ships for macOS and Windows as AU, VST3, and AAX through RysUpHub. FL Studio uses the VST3 build for this guide.
Start with one voice and center it. Add the second layer for harmony, octave weight, or contrast. Keep both layers readable in mono before pushing Width.
Fix silence in this order
- Confirm the raw vocal reaches the Mixer track.
- Confirm RysUpVocoder is active in the effect slot.
- Set Input Mode to MIDI.
- Match the MIDI Out Port and wrapper Input Port.
- Draw one sustained MIDI note across the vocal phrase.
- Confirm the Mixer track reaches the Master.
- Reset the plugin mix and output controls.
- Disable sidechain mappings until the main route works.
Change one item at a time. Rebuilding the whole route hides the missing link and makes the next failure harder to diagnose.
Print the vocoder cleanly
Route the vocoder Mixer track to a fresh print track or export the selection from FL Studio. Leave a dry vocal duplicate muted and preserved so the effect can be rebuilt later.
Render at the project's current sample rate. Check the printed file from the first consonant through the last release. Confirm no note ends early and no plugin tail is cut.
For a hook, print one centered lead vocoder, then build separate doubles or harmony layers. This is easier to balance than one enormous stereo print.
Run the complete FL Studio vocoder test
Dedicated Mixer track
VST3 effect slot
Matched Port numbers
Overlap every word
Check the rendered tail
Once this route passes, save it as an FL Studio template. Rename the channels, color the vocal and MIDI pair, and keep the Port number visible in the channel name. The next session should begin with music, not another routing hunt.
Route it once and get back to the hook
A working FL Studio vocoder needs only three signals to agree: vocal audio, MIDI notes, and the Mixer output. Start in MIDI mode, match the ports, overlap the phrase, and build clarity before width.
Sources checked September 5, 2026: Image Line Plugin Wrapper manual, Image Line MIDI Out manual, Image Line Mixer manual, RysUpVocoder product page, and RysUpVocoder update feed.
Once the MIDI and vocal routing work, use the robotic vocals workflow to choose the texture, sustain the notes through each word, and check consonant clarity with the beat playing.