
Parallel compression vocals should make the quiet words feel closer without flattening the lead. Keep the main vocal natural, send a copy to a heavily compressed return, then raise that return until the voice feels denser. Stop before breaths, room noise, and consonants start shouting.
Disclosure: Rys Up Audio makes RysUpComp. This guide uses one of its compressor workflows, but the routing method works with any compressor that can handle a fully wet return. Product details and shipping files were checked September 2, 2026.
The fast answer: create a post fader send from the lead vocal to a stereo aux. Put the compressor on that aux, set it fully wet, use a high ratio, lower threshold until loud words trigger roughly 10 to 15 dB of gain reduction, then pull the return all the way down. Raise it slowly under the lead. Match the combined loudness before deciding whether the vocal improved.
What parallel compression changes
Normal insert compression turns down peaks on the main vocal path. Parallel compression keeps that main path available and adds a second path that is intentionally much flatter. The dry vocal preserves the front edge of words, phrase movement, and emotion. The compressed return raises low details, sustain, and body.
That difference is why the method can make a vocal feel larger without asking one compressor to solve everything. You are not trying to hide the compression on the return. You are using a heavily controlled signal as a layer and deciding how much of that layer the mix needs.
The danger is simple. Louder usually feels better for a few seconds. If the combined dry and parallel signal is even 1 dB louder than the dry signal, the comparison is biased. Level matching is not an optional polish step. It is the only way to know whether density improved or volume merely increased.
Use it when the lead feels thin between peaks
For a dense Rock chorus, keep one clear lead. Add the compressed layer only until the quieter words stay audible against the guitars. If you need a different starting tone around that routing, compare the Rock vocal preset collection, choose the matching DAW version, and keep this parallel return as a separate listening decision. More density is useful only while the words remain clear at matched loudness.
Parallel compression works best when the loud phrases already feel good but the quiet syllables disappear behind the beat. It can also help a singer whose tone loses weight at the ends of lines, or a hook that needs more density without losing the snap of the original consonants.
Do not reach for it first when the performance has wild clip to clip level changes. Fix those with clip gain or a riding pass. The workflow in Level Vocals Before Compression keeps one loud phrase from forcing every compressor decision. Parallel processing is a finishing move after the source is reasonably controlled.
It is also a poor first fix for mud, harshness, or room noise. A compressed copy will lift all three. Clean the source before creating a louder version of the problem.
Use this upward and downward compression decision when you need to know whether the quiet side should rise or the loud side should fall.
Build one clean aux return
Route the lead vocal to the mix as usual. Add a post fader send from that vocal to a new stereo aux. Name the aux Vocal Parallel. Post fader routing keeps the return relationship stable when you adjust the lead vocal fader later.
Insert the compressor on the aux and set its wet mix to 100 percent. The main track already carries the dry vocal. Blending dry signal again inside the return makes the balance harder to read and can create a level jump that looks like improvement.
Natural dynamics and articulation
One controlled copy to the aux
Fully wet and intentionally obvious
Blend density under the lead
A duplicate audio track can work, but an aux is easier to maintain. If you duplicate, every edit, fade, timing move, mute, and clip gain change must stay identical. One missed edit creates comb filtering or a double consonant that sounds like a phase problem.
Start aggressive, then blend quietly
This page does not replace the broad threshold, ratio, attack, and release guide. The parallel job is narrower. Make the return obviously controlled, keep it 100 percent wet, and use the return fader as the real decision control.
One useful starting pass is an 8:1 ratio, 3 to 10 ms of attack, 50 to 150 ms of release, and enough threshold or input drive to show roughly 10 to 15 dB of reduction on loud words. Treat those numbers as a way to expose the return, not as universal vocal settings. Tune recovery to the phrase, then move immediately to the blend and loudness match.
If the return needs to be loud to matter, the settings may be too gentle. Make the compression more obvious and lower the fader. A quiet, strongly controlled layer is often cleaner than a loud, barely compressed duplicate.
Blend without falling for louder
Pull the return fader to silence. Play the densest section of the song, not an exposed verse. Raise the return until the quiet words remain audible when the drums and instruments are active. Then back it down slightly.
Route the dry vocal and parallel return to one vocal bus. Compare that bus with parallel active and muted. Trim the combined output so both versions feel equally loud. The useful version should feel steadier and closer, not simply bigger on the meter.
Now test at low monitor level. If the vocal still reads clearly when the room is quiet, the blend is helping. If only breaths, S sounds, and headphone bleed jump forward, the return is exposing the wrong details.
Stop breaths and S sounds from taking over
Heavy compression lifts everything between the peaks. That includes breaths, room tone, mouth noise, and sibilance. Edit obvious noise before the send. If the main vocal already has a de esser, place the send after that stage when your DAW allows it.
You can also place a gentle de esser on the parallel return. Use it only to keep the return from spitting. Do not erase all top end or the layer will add dull low mid weight instead of useful presence.
A high pass filter before compression can keep plosives and stand vibration from driving the detector. Start low enough that you are removing rumble, not the useful body of the singer. The high pass vocal workflow explains how to find that boundary.
Check alignment before changing the tone
Modern DAWs usually compensate for plugin latency, but routing mistakes can still create comb filtering. Mute and unmute the return while listening in mono. The vocal should gain density without losing its center or becoming hollow.
If the tone collapses, verify that the return is not feeding another path, that no duplicate track is offset, and that both channels use the same edits. Do not drag audio by eye to fix a plugin latency guess. First remove unnecessary routing and let the host compensation do its job.
Time based effects on the parallel return can also blur the comparison. Keep the first pass to compression, optional filtering, and careful level. Add color only after the routing is proven.
Run the workflow in RysUpComp
RysUpComp is $49.99 and provides four compressor workflows in one plugin. For the cleanest learning pass, start with the main compressor view because threshold, ratio, attack, release, gain, mix, and trim make the signal path obvious. Put it on the aux, set Mix fully wet, then use the return fader as the blend control.
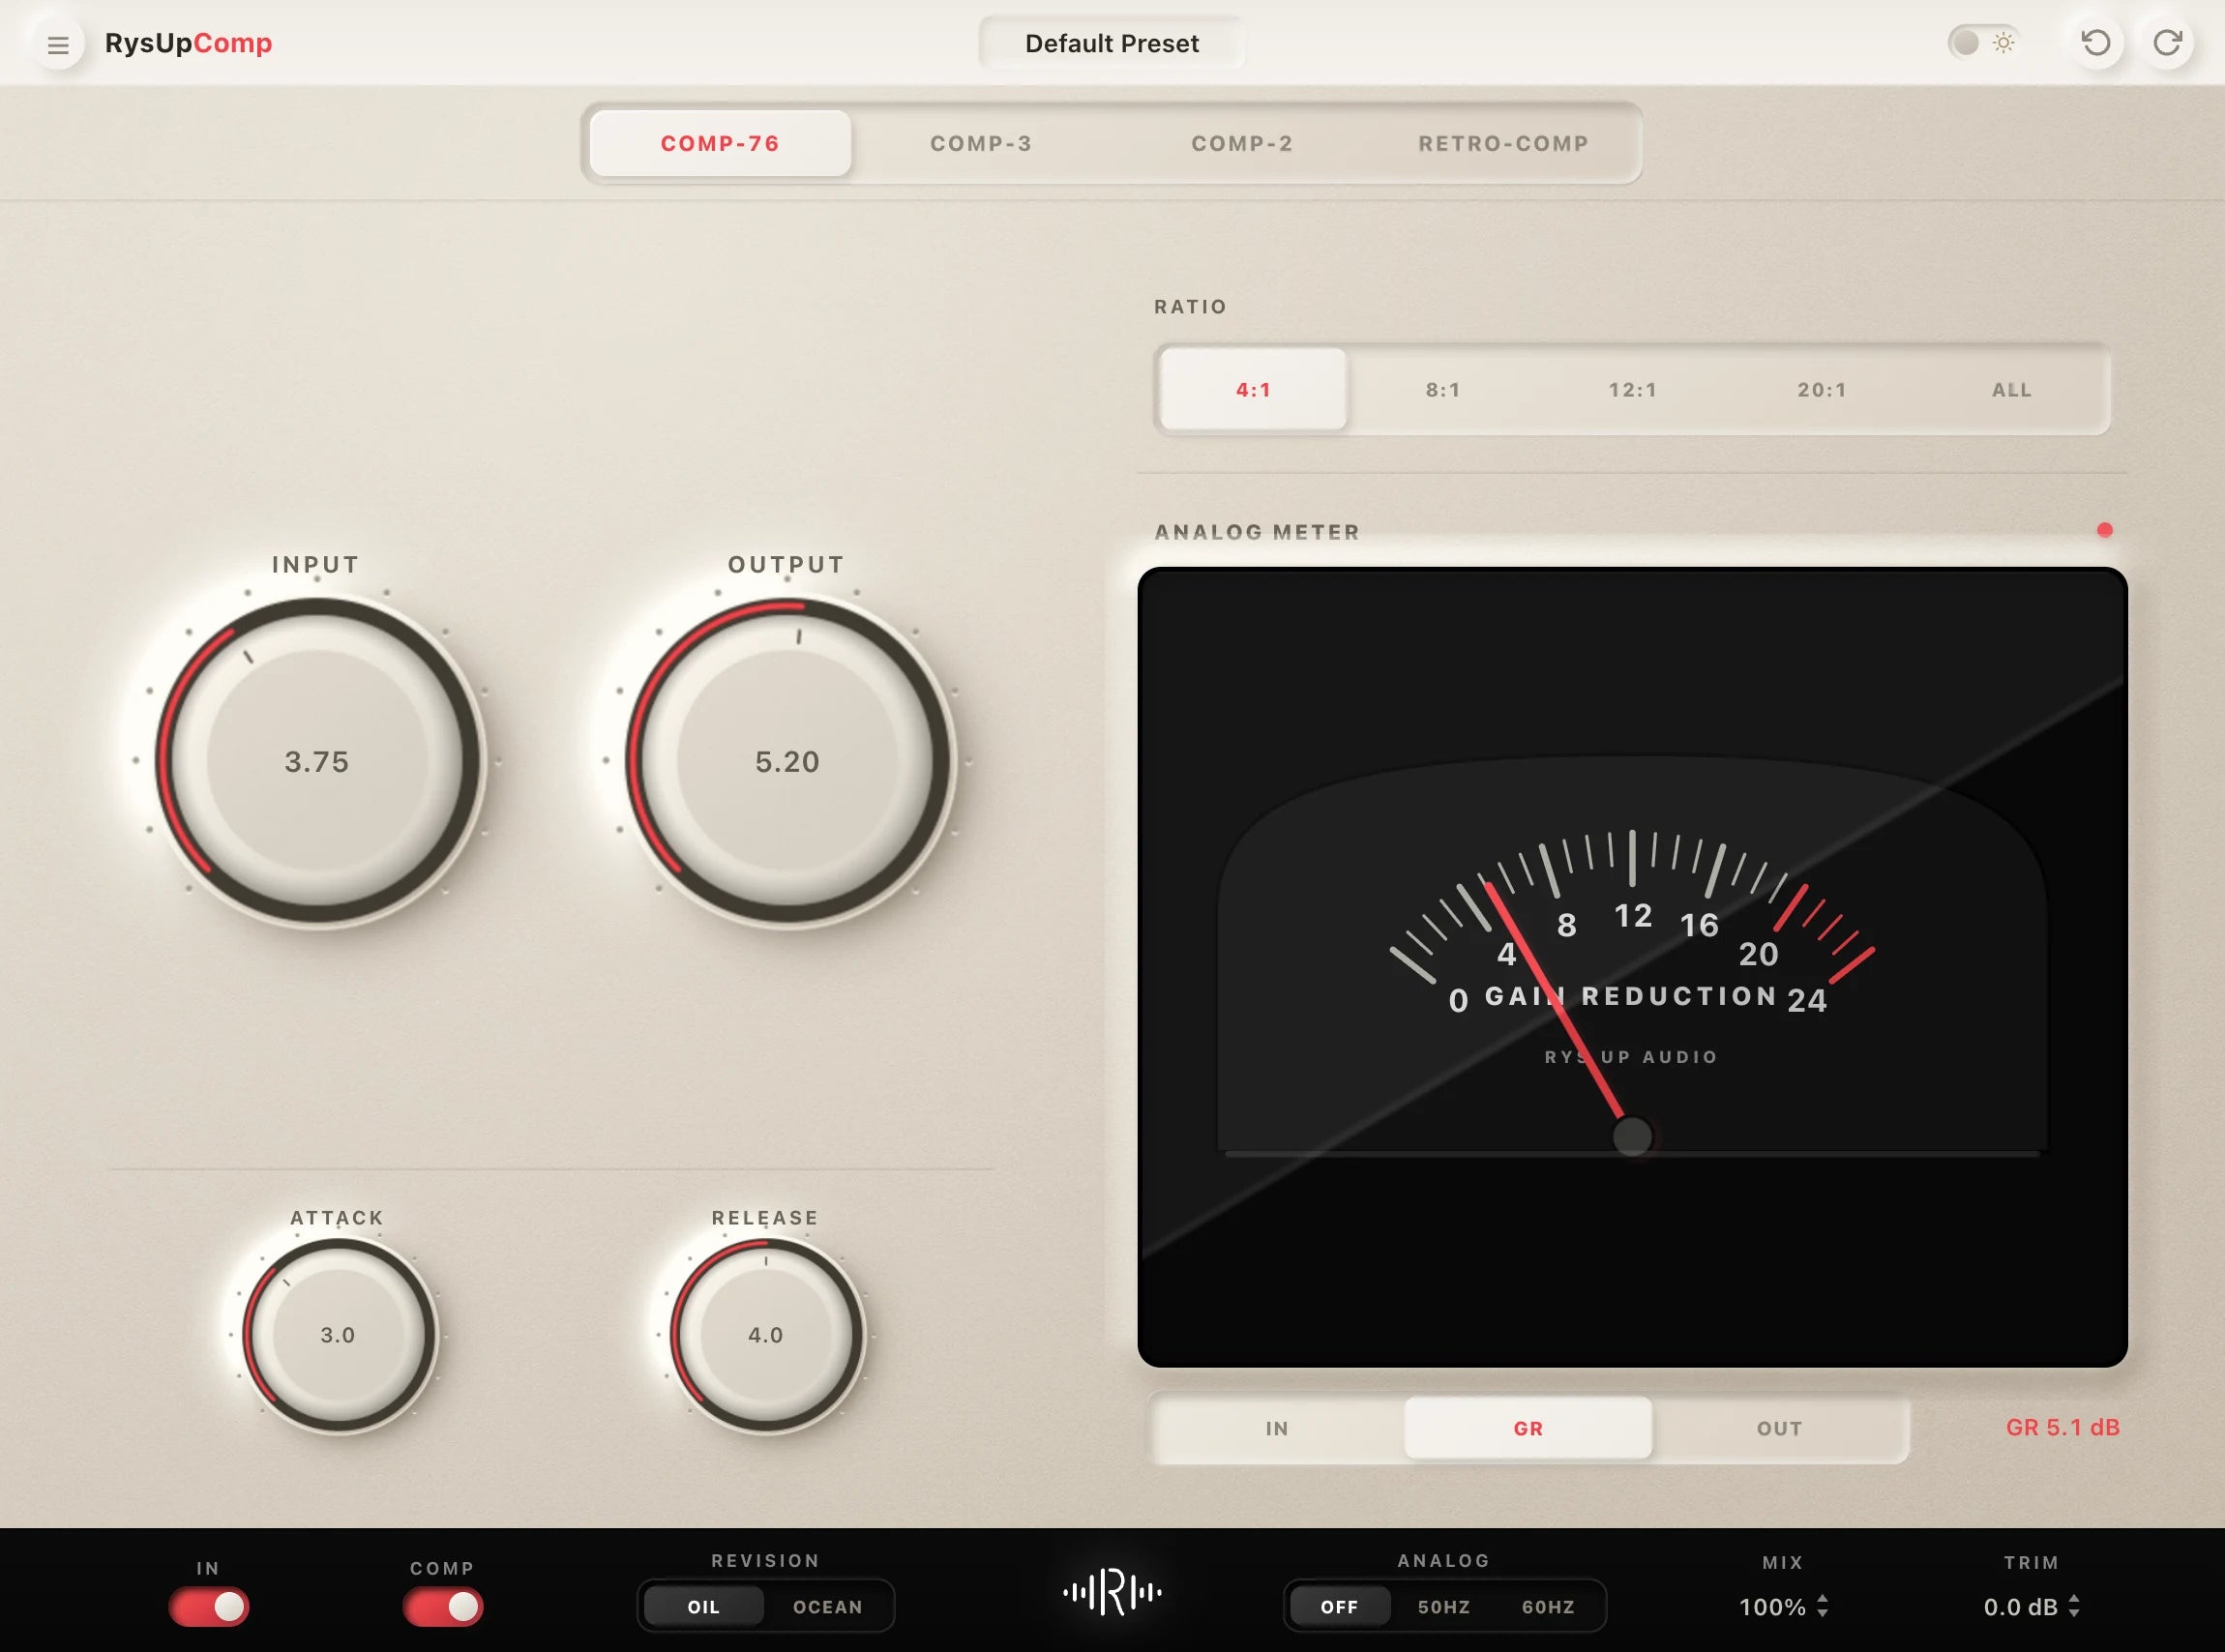
Once the routing works, audition the other compressor views at the same return loudness. Choose by recovery shape and vocal character, not by which option gets loudest. The current update feed lists version 1.6.10 with macOS AU, VST3, and AAX plus Windows VST3 and AAX artifacts.
If you want the full current paid lineup in one path, RysUpSuite is the broader option. Browse the current lineup first, then install through RysUpHub.
Use one repeatable listening test
- Choose eight bars that include a quiet line, a loud line, a breath, and a strong S sound.
- Set the parallel compressor aggressively and leave the return muted.
- Raise the return until the quiet line stays present in the full mix.
- Trim the vocal bus so active and bypassed versions are equally loud.
- Check solo, full mix, low volume, headphones, and mono.
- Mute the return after five minutes. Keep it only if the vocal loses useful density.
Save the setup as a routing template, not a universal preset. The send level, threshold, and release must follow the singer and the song.
Skip it when one clean compressor already works
Parallel compression is not automatically more professional. If the main vocal already feels consistent, forward, and natural after basic leveling and one insert compressor, another path can create noise and clutter without adding value.
Skip it when the room tone is obvious, the singer is extremely sibilant, or the arrangement leaves the vocal exposed. In those cases, source cleanup and subtle serial control usually translate better.
Use it when you can name the missing result: quiet words need density, the hook needs weight, or the vocal loses presence when the beat enters. A clear job makes the blend easy to judge.
Build the rest of the chain around the result
Keep the broad settings and detector decisions with the complete vocal compression guide. Use this page only for parallel routing, aggressive return settings, and loudness matched blending. That boundary keeps both workflows useful.
After the vocal density is right, use the vocal chain order guide to place de essing, tone, delay, and reverb without letting the parallel return feed the wrong stage.
Sources checked September 2, 2026: RysUpComp product page, RysUpComp update feed, Sound On Sound send and return compression, and Sonarworks vocal compression guide.