
To use a vocoder in Pro Tools, put the vocoder on a stereo audio or aux track that receives the vocal, route a separate MIDI track to the plugin MIDI node, record or draw sustained notes, and make sure input monitoring is active. In RysUpVocoder Sidechain mode, route a separate vocal modulator through a named mono bus and select that bus as the plugin key input.
Disclosure: Rys Up Audio makes RysUpVocoder. This guide uses current Avid routing documentation and the shipping RysUpVocoder build. Product and format details were checked September 4, 2026.
The fast answer: create a stereo audio track for the dry vocal, insert the AAX vocoder, create a MIDI track, reveal the MIDI track's I/O controls, and choose the vocoder instance as the MIDI Output target. Record enable or monitor the audio track, hold a chord on the MIDI track, and confirm that both the vocal and MIDI arrive at the same time. Silence almost always means one of those two signals is missing.
A Pro Tools vocoder needs two signals
A vocoder needs a modulator and a carrier. The vocal is the modulator. It supplies the words, rhythm, and changing tone. The carrier supplies the pitch and harmonic energy. In a simple MIDI driven setup, the plugin creates the carrier from the notes you send.
That means a vocal waveform alone is not enough. A MIDI chord alone is not enough. The effect becomes audible only when the voice and carrier overlap.
Words and timing
Analyzes and combines
Pitch and chord
Playable vocal layer
If the result is silent, look at this four step path before changing any sound design control.
Build the MIDI driven setup first
- Create a stereo audio track and place the vocal clip on it.
- Insert the vocoder in an AAX insert slot.
- Create a MIDI track and name it Vocoder MIDI.
- In the Edit window choose View, then Edit Window, then I/O so the MIDI Output selector is visible.
- Set the MIDI Output to the virtual node for the exact vocoder instance.
- Draw or record a chord that overlaps the vocal phrase.
- Record enable or input monitor the tracks needed for live playing.
Avid documents MIDI nodes as virtual connections to software instruments and MIDI enabled audio plugins. The instance name in the MIDI Output selector is the connection that matters. If you have several vocoders open, name the audio tracks clearly so you do not send notes to the wrong one.
Choose an audio track or an aux return
Use an audio track when one vocal clip owns the effect. The routing is direct and the session stays easy to read. Duplicate the playlist or print the result to a new audio track when the part is approved.
Use an aux when several vocals should feed one shared vocoder, or when you want a clean dry lead beside a separate processed return. Send the vocal to a named stereo bus, set the aux input to that bus, insert the vocoder on the aux, and route the MIDI track to that instance.
Keep the first test simple. One audio track and one MIDI track expose the signal path faster than a large aux system. Move to a return after you hear a clear playable result.
Pick the correct vocoder input mode
| Mode | Vocal source | Carrier source | Best first use |
|---|---|---|---|
| MIDI | Main audio input | Notes from the MIDI track | Playable chords and hooks |
| Voice | Main audio input | Derived from the voice path | Fast vocal layer without separate routing |
| Sidechain | Separate vocal on the key input bus | Internally generated carrier that follows the sidechain vocal | Feed a separate modulator without moving the insert |
Start in MIDI mode because it proves the two signal concept with the least routing. Use Voice mode when you want a quick layer driven by the incoming vocal. Use Sidechain mode when the vocal modulator should arrive through the key input while the plugin stays on another track or aux.
Route a separate vocal through the key input
Choose the vocal that should provide the words and timing. Send it to an unused mono internal bus. Open the vocoder plugin window, select that bus from the Key Input selector, and set RysUpVocoder to Sidechain mode.
Avid documents a key input as the path that lets a separate audio source feed a plugin that supports sidechain processing, and its current reference guide specifies a monophonic key input. The selector appears only when the plugin exposes that input. If it is missing, confirm that you inserted the AAX plugin and that the key bus is mono.
RysUpVocoder treats this sidechain signal as the vocal modulator. Its internal carrier still supplies the pitched harmonic energy. Keep the sidechain vocal dry and clear so consonants reach the analysis path without reverb or delay smearing them.
Choose a chord that makes the words clear
Start with one sustained root note in the song key. Add the third and fifth only after the words are understandable. Dense extended chords can sound huge, but they spread the vocal energy across more pitches and can hide consonants.
Place the MIDI note slightly before the first vowel and hold it through the full word. If the note begins late, the first consonant disappears. If it ends early, the last syllable drops out even though the vocal clip continues.
Use a higher octave when the result is dark and buried. Use a lower octave when it is thin. Change pitch before reaching for a large EQ boost because the carrier register controls where the sound begins.
Run the setup in RysUpVocoder
RysUpVocoder supports MIDI input plus Voice, MIDI, and Sidechain modes. Insert the AAX plugin on the vocal track, choose MIDI mode, then point the Pro Tools MIDI track at the plugin node.
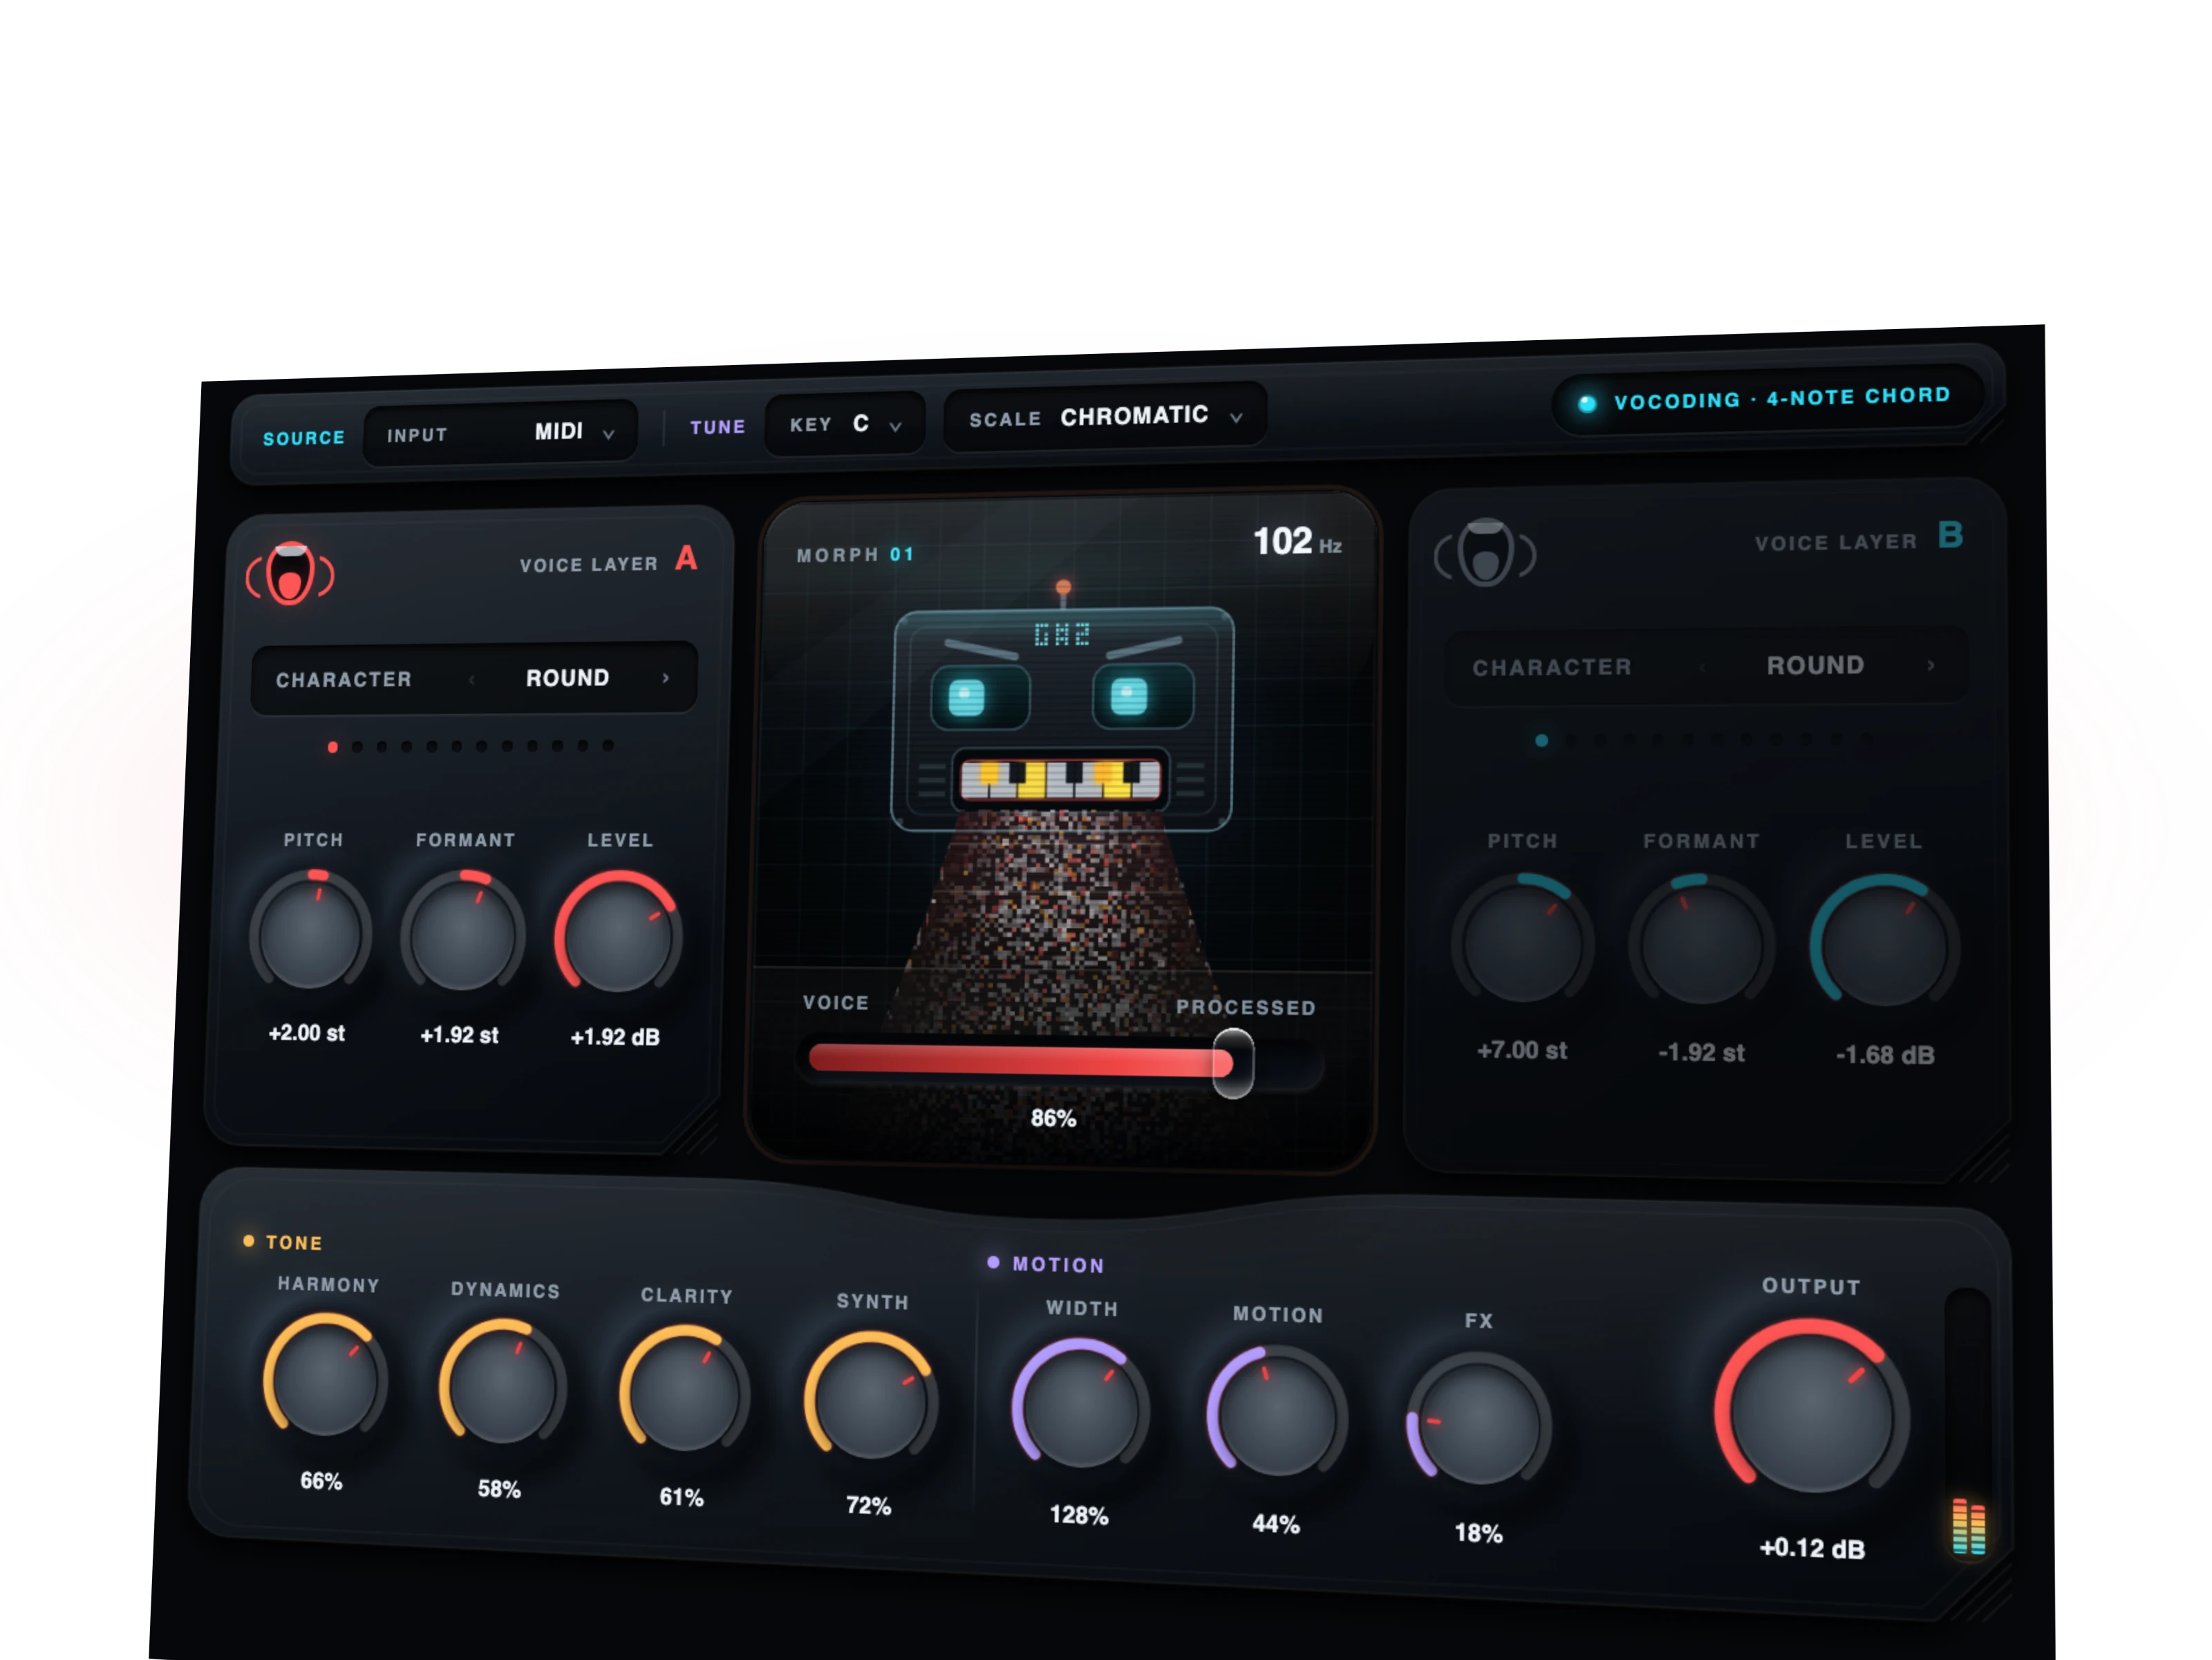
Begin with one layer. Set a clear character, keep pitch near the played MIDI notes, and leave formant close to neutral. Bring in the second layer only when the single layer is understandable in the beat. Two complicated layers do not repair one unclear layer.
The current release is version 1.1.4. It costs $29.99 outright and ships for macOS and Windows through RysUpHub. Current format coverage is AU, VST3, and AAX on macOS plus VST3 and AAX on Windows.
Fix silence in this order
- Confirm the vocal meter moves. The audio track must receive or play the modulator.
- Confirm the MIDI meter moves. Record enable, monitor, or play a MIDI clip.
- Confirm the MIDI Output target. Choose the exact vocoder plugin node.
- Overlap the notes and words. The carrier must exist while the vocal speaks.
- Check the input mode. MIDI mode expects the main vocal input while Sidechain mode expects the vocal on the key input.
- Check the key input. Sidechain mode needs the same named mono bus on both ends.
- Check the output path. The audio or aux track must feed an audible bus or monitor output.
Do not start by reinstalling the plugin. AAX scanning is already proven when the insert opens. Most no sound problems are routing, monitoring, mode, or timing.
Make the vocoder words easier to understand
Use a dry vocal with clear consonants. Turn down reverb and delay before the vocoder. Those effects smear the modulator envelope and make every syllable less precise.
Raise the carrier register, brighten the carrier, or reduce the chord to one or two notes. Keep one voice layer centered and narrow while you solve intelligibility. Add width after the words survive the full mix.
Blend a little clean vocal beneath the effect when the lyric matters more than a completely synthetic texture. The dry layer restores consonants without forcing extreme brightness into the vocoder.
Print the part before the routing gets forgotten
Create a new stereo audio track and set its input to a fresh internal bus. Send the vocoder track or aux to that bus. Record the processed part from start to finish.
Keep the original audio, MIDI clip, plugin state, and printed result. The MIDI remains editable. The printed audio protects the approved sound if routing changes later.
Name the print with the song section and revision. A label such as Chorus Vocoder Print 02 is more useful than Audio 47 when the session returns a month later.
Use one repeatable Pro Tools test
- Choose a four bar vocal with hard consonants and a held vowel.
- Route one MIDI note through the exact plugin node.
- Confirm the word is audible before adding a chord.
- Add the third and fifth, then compare intelligibility.
- Try one higher octave and one brighter carrier.
- Check the result in the beat, in mono, and at low monitor level.
- Print the best pass at 48 kHz and reopen the session once.
Keep the version that preserves the lyric and supports the arrangement. The widest or brightest solo result is not automatically the best hook.
Skip the vocoder when the voice should stay human
Do not use a vocoder to repair pitch, timing, noise, or a weak recording. It replaces much of the original vocal identity with a carrier driven sound. Fix the source first when the goal is a natural lead.
Skip it when the lyric carries detailed emotion that the synthetic layer hides. A small double, harmony, or filtered delay may create size without changing the person behind the performance.
Use it when the transformation is the point: a robotic hook, playable background layer, producer tag, transition, or contrasting response to the lead.
Keep the routing visible and named
Name every track and bus before the session grows. Vocal Modulator, Vocoder MIDI, Modulator Bus, Vocoder Aux, and Vocoder Print tell the story at a glance. Hidden routing is what makes the effect feel difficult.
The broad vocoder guide explains carrier and modulator theory. The vocoder buyer guide compares product selection. This page owns the Pro Tools AAX, MIDI node, key input, monitoring, and print workflow.
Sources checked September 4, 2026
- Avid current Pro Tools documentation hub for the current reference guide.
- Avid Pro Tools Reference Guide 2026.4 for MIDI Output, MIDI Node Display, I/O view, and monophonic Key Input behavior.
- RysUpVocoder product page for current price, public workflow, platform, and format details.
- RysUpVocoder update feed for version 1.1.4 and current macOS and Windows artifacts.
Menu labels can move between Pro Tools versions and workspace layouts. The current Avid documentation hub lists Pro Tools 2026.4 as the active reference set. Use the exact instance name and bus names visible in your session.